If your Scout II fuel gauge or sender is not working correctly, we have a troubleshooting guide for you.
There are four basic parts of the fuel indicator system.
1. Gauge
2. Regulator
3. Path through the wiring harness
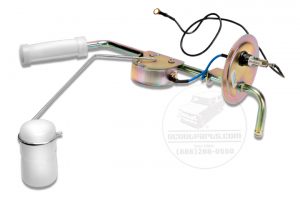
4. Sender
All four components have to be working 100% in order to read “full” when full and “empty” when empty.
The regulator is the place to start. The regulator has 12-14 volts going in and about 5 volts coming out. It is really 12 volts, switched on/off averaging 5 volts.
If yours is not working you can buy a new regulator here on Scoutparts.com.
Now you must make sure that you have a working gauge. And being that you have just tested your regulator, you can use it to test your gauge.
Once you have proven that you have a working Scout II gauge and regulator the next thing to test is the sender. You will have to drop the fuel tank and remove the sender. The sender should have 0 ohms at full and 90 ohms empty. A sender can be purchased here on Scoutparts.com.
The last thing to test is the connection from tank to dash gauge. It must have zero ohms of resistance.
It is very common to have 20 or 50 ohms of resistance in the wire. This is due to corrosion on the connectors as the current travels through the wiring harness.
With those 4 tests, you should be able to troubleshoot the problem of a faulty fuel gauge.