Exhaust Manifold Bolts That Don’t Break

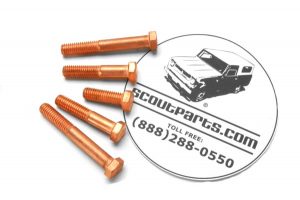
I have removed at least 100 International Harvester exhaust manifolds.  I have never had a exhaust bolt break.  I was talking with another mechanic that is used to working on all different brands of engine and he was worried about the bolts breaking off in the engine block. Fortunately this does not happen to IH engines because IH used copper clad bolts that somehow are able to prevent the bolt from bonding to the block. It is hard to tell that they are copper clad bolts , because they are only shinny copper colored when brand new. The bolts turn black the first time that they are ran up to temperature.

So word to the wise, if you remove an exhaust manifold make sure that you replace the bolts with these special copper clad bolts.  They can be found here.

Posted in Uncategorized | Comments Off on Exhaust Manifold Bolts That Don’t Break

Good weather is coming soon. Time for a show bar!

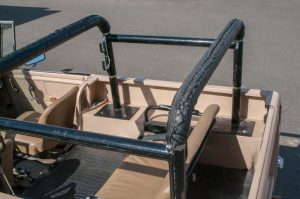
It won’t be too many weeks before us in the northern parts of the states start thinking about driving with the top off.  Scoutparts.com is the exclusive supplier of the Safari Bar for your Scout 80, 800 Scout 800A and Scout 800B.  This bar is shipped in a box and must be welded together on site.  This bar looks great and is perfect for hanging onto if you are riding in the back.  It is also good place to hang up speakers and first aid kits.  The best use is to hold up your bikini top.   We make a group of 10 bars at a time. If you want one by spring,  you should order now.  You can find it on here, only at Scoutparts.com.

** Disclaimer… This bar is designed to look good and be economically shippable.  Please keep in mind that unless a roll bar is welded directly to the frame, it is not an official roll protection device.  In a roll over event, it will be better than nothing, but it should not be relied upon to protect you or your passengers.

Posted in Uncategorized | Comments Off on Good weather is coming soon. Time for a show bar!

Tail Light Lenses for your Scout II

There is a lot of confusion about tail light lenses for Scout II.

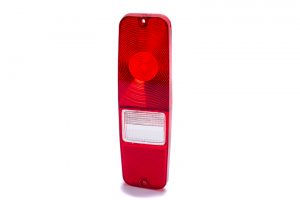
The early design for Scout II tail lights was basically two parts.  A stamped and chromed metal bucket with two metal light bulb sockets crimped into place to hold the bulbs.  The red flat lens was screwed into the bucket.  If your lens is cracked broken or just fading to pink, you probably want to replace it.  This type was used from 1971 to 1977. You can find them here.


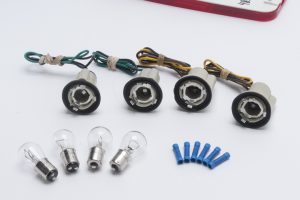
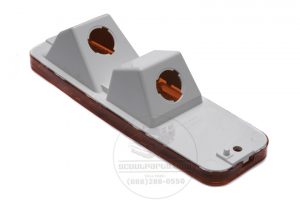
In 1978 this tail light arrangement was changed to eliminate the metal chromed bucket. IH needed to save money and this is what they did for model year 1978, 79 and 1980.  They introduced a new lens and bucket made of plastic. It eliminated the bucket but required new special grounded sockets.  Scoutparts.com has a rebuild kit that replaces the sockets. You can find them here.

Here is a look at the bucket/lens combination that IH used in 1978-1980. You can find those here.

Posted in Uncategorized | Comments Off on Tail Light Lenses for your Scout II

Spring shock plates reproduction

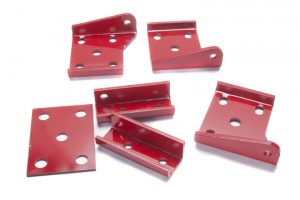
Scoutparts.com makes all kinds of reproduction spring and shock mount plates.   Often we don’t think about all the parts underneath your rig that hold the springs and axles together.  Now that that your Scout is a minimum of 38 years old, they’re breaking often as you use it off road. Scoutparts.com makes a series of parts to hold your suspension together.  If you need such parts, you can find them here

Posted in Uncategorized | Comments Off on Spring shock plates reproduction

Scout II Fuel Gauge Not Working?

If your Scout II fuel gauge or sender is not working correctly, we have a troubleshooting guide for you.

There are four basic parts of the fuel indicator system.

1. Gauge

2. Regulator

3. Path through the wiring harness

4. Sender

All four components have to be working 100% in order to read “full” when full and “empty” when empty.

The regulator is the place to start. The regulator has 12-14 volts going in and about 5 volts coming out.  It is really 12 volts, switched on/off averaging 5 volts.

If yours is not working you can buy a new regulator here on Scoutparts.com.

Now you must make sure that you have a working gauge.  And being that you have just tested your regulator, you can use it to test your gauge.

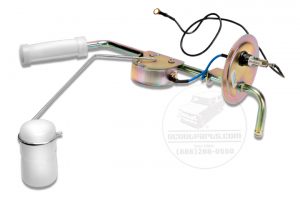
Once you have proven that you have a working Scout II gauge and regulator the next thing to test is the sender. You will have to drop the fuel tank and remove the sender. The sender should have 0 ohms at full and 90 ohms empty.  A sender can be purchased here on Scoutparts.com.

The last thing to test is the connection from tank to dash gauge. It must have zero ohms of resistance.

It is very common to have 20 or 50 ohms of resistance in the wire.  This is due to corrosion on the connectors as the current travels through the wiring harness.

With those 4 tests, you should be able to troubleshoot the problem of a faulty fuel gauge.

Posted in Uncategorized | Comments Off on Scout II Fuel Gauge Not Working?

Points suck, Simple electronic is best way to go.

Adding electronic ignition is easy.

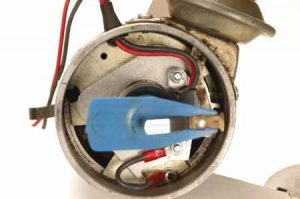
Points are such a pain in the butt. Only once Have I been left by the side of the road while driving a International Scout.   The points had closed and it was not going to run.  It was late at night and I was unable to see if there was a  gap and so I had to give up.  I had to tow it home.   Points are a pain and replacing them with an electrical pickup is a cheep and easy way to ad reliability, horse power, fuel economy and reduce maintenance.

So easy,  Just remove the old points and condenser.  Use the provided screws and screw the new plate in and thread the wires through the hole in the side of distributor. Now put the magnetic ring, rotor, distributor cap and just start it up and drive.   The Brand we sell is Pertronix is one of the best kits on the market.

Posted in Uncategorized | Comments Off on Points suck, Simple electronic is best way to go.

Directions for “Heavey duty wiper” installation

I just wrote these directions and I am hoping that some one that has installed these and they might give me some feed back on the accuracy.

____________________________________________

Directions for installation of heavy duty wipers for International Scout II 1971 to 1980 SP10201


You have purchased a heavy duty  replacement wiper. These are different from the original factory wiper set up. You will need to modify your old arm to make the new wiper arm fit.


Unmodified wiper arm procedure.

Step One –Lift wiper arm and pull back small retainer tab and remove original wiper.

Step two –. Locate post that the original wiper was attached by. (The post the old wiper was hanging onto.) This post must be removed.  You will need to drill it out.  The post is really just a long rivet.

Step three – Locate the end of the rivet that is bent over by the original installation of the rivet.  (It will have a small depression in the middle of the rivet.)  That end will need to be drilled out.  Use a 1/8th” metal drill bit, or larger.

Step four – Remove the post from the arm.

Step five –Place the new wiper on the arm and keep it in place with the small nut and bolt included.


Already modified wiper arm procedure.

Step one – Remove the small nut and bolt retaining the old wiper.

Step two – Remove old wiper.

Step three – Place the new wiper on the arm and keep it in place with the new small nut and bolt included.

Caution:  It is not recommended for an untrained person to use any power tools or any sharp or dangerous tools.


Posted in Uncategorized | Comments Off on Directions for “Heavey duty wiper” installation

Windshield wiper kit with new arms for Scout II

I just wrote directions for the Windshield wiper and arm kit for Scout II.

The original wiper arms for Scout II are only available used and the numbers are dwindling.  Because of this I came up with a Kit that replaces arms and wipers.

Here are the directions for installation.  I am hoping that some one out there that has installed them will give me some feed back on how accurate and helpful these directions would have been.

___________________________________________________________________________
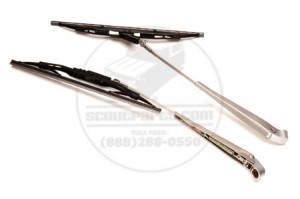
Complete wiper and arm kit for Scout II

Directions for installation “Scout II Wiper Blade and Arm Kit”  for International Scout II 1971 to 1980 SP16468


You have purchased a replacement wiper and arm kit. These are different from the original factory wiper set up. You will need to adjust your wiper arm to fit


wiper arm intsallation  procedure.

Step One – get a rag and a pair of pliers, place the rag over the old wiper arm at the pivot point.
Use the plyers to grab the wiper arm at the pivot point.  Rock back and forth and pull.  This should dislodge the old arm.  The knob that the wiper arm was pivoting on is called the “Cap stand”

Step two –. Use your hands to  push the new arm onto the cap stand.

Step three –  Use the included plastic adaptor to mount the new wiper onto the new arm. ( If this not with in your mechanical abilities you should take this job to a professional.)

Step four – Use a flat screw driver to losten the screw at the end of the new arm.  Once the screw is loosened, pivot the drivers side arm to be roughly parallel to the dirver side vertical edge of the windshield.

Step five – adjust the passenger side wiper so it is out of the field of vision in the “off” position.

Step six. – use a garden hose to wet the windshield to lubricate the wipers.  Then activate the wipers and adjust for best results both at rest and in operation.


Caution:  It is not recommended for an untrained per to use any power tools or any sharp or dangerous tools.


Posted in Uncategorized | Comments Off on Windshield wiper kit with new arms for Scout II

Scout II Rear Emergency Brake Cable Replacement

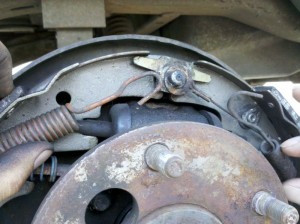
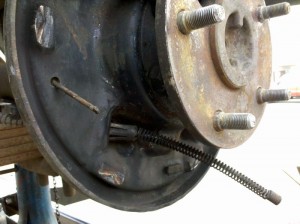
My Summer Scout (1979 Scout II Terra) has lower gearing (3.73 versus 3.09) than my Winter Scout  (1979 Scout II). The Summer Scout also has a T-19 manual transmission and a tow hitch to tow my 1971 19′ Fiberform boat. To lauch a boat it is helpful to have a working emergency brake so that you don’t end up in the river. My rear brake cable broke a number of years ago, so it is finally time to replace it. The first step in brake cable replacement is to remove the rear wheels, and disassemble the rear shoe assembly. Scout II rear brake shoesIf you have a standard Scout II  you will need a shorter cable than the one that I used. There are probably some skilled mechanics who can thread one of these cables without removing the shoes, but I had a rusty old cable stuck to the backing plate and it seemed easier to make some space. Once the shoes were removed, the old cable was exposed. There is a brake cable tool that will compress the backing plate catching fitting to allow for the cable to be removed from the plate. I did not have one of these tools so I had to twist the cable a bit while pressing the fitting through the backing plate with a flathead screwdriver.

Scout II rear emergency brake cable

Scout II backing plate with brake cable exposed

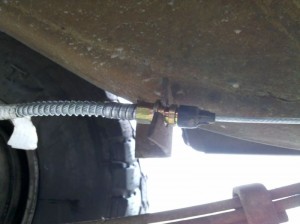
With the old cable removed the new cable snaps right into place. Make sure that you thread the cable OVER your leaf spring on the way to the cable routing guides. The first time that I installed one of these cables I had to do some rework because I screwed this part up.

scout ii brake cable routing

Route the cable over the leaf spring and through the cable router

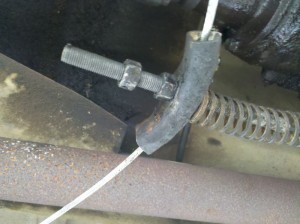
The last step is to adjust the cable at the adjusting nut where the rear cable is connected to the front cable. I found that my old cable had stretched a bit and had to be adjusted down the stud on the front cable to keep the rear wheels turning. The rear cable passes below the front cable in the adjuster bracket. Scout II parking brake adjuster

Posted in Uncategorized | Comments Off on Scout II Rear Emergency Brake Cable Replacement

Scout II Lost Power Brakes

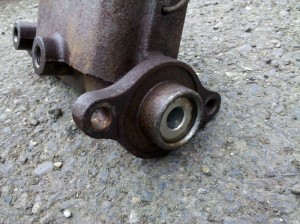
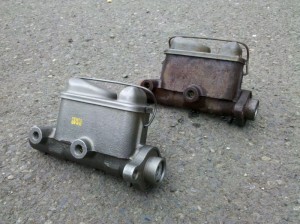
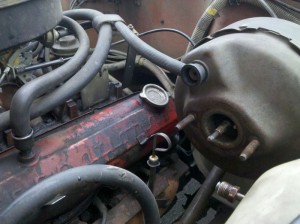
The Orange 1979 Scout II , which serves as my summer Scout, lost power brakes last week. The car would still stop if you stood on the pedal, but had no power brake assist. The first step in diagnosing the problem was to look for missing brake fluid. I opened the lid to the master cylinder and noticed that the smaller (rear) reservoir was half empty. The rear reservoir pushes fluid into the front calipers, so I inspected the area around each caliper for brake fluid, but found no leaks. I knew that the fluid was going somewhere, so I pulled the brake master cylinder off of the brake booster to inspect the main piston seal. Scout II Brake Master CylinderThere was evidence that fluid had made its way past the seal and was slowly leaking by the cylinder. This small fluid leak necessitated my changing of the master cylinder, but did not explain my main problem, a lack of power brakes! The next thing that I checked was that my piece of fuel line that I had used to run vacuum from the Holley 2300 2 bbl carburetor to the brake booster was solid and intact, which it was. Next I removed the booster vacuum check valve and line and connected a vacuum tester to the booster to test the diaphragm.  I applied 75 psi and watched the vacuum gauge to look for any movement in the needle, the needle stood still. The only other part that I thought might be malfunctioning was the check-valve between the carburetor and the booster. I swapped the check valve with a new one reassembled the brakes with a new master cylinder,New Scout II Brake Master bench bled the cylinder and reconnected the lines. The check valve was the culprit, the brakes worked great! It was nice to know the I had caught my slow master cylinder leak in the process to avoid a future accident.Scout II Brake Booster

Posted in Uncategorized | Comments Off on Scout II Lost Power Brakes